This article guides you through the process of performing a clean installation of macOS 10.15 Catalina using the bootable USB drive method, rather than upgrading your Mac using Apple's standard installation package, which retains existing user data and any user-installed apps.
Creating a bootable USB drive provides you with a convenient way to install a fresh copy of macOS Catalina on multiple Macs. Performing a clean install can also remove annoying quirks and strange behaviors that your Mac may have inherited over time, and often helps to reclaim disk space caused by junk files left by third-party apps.
To follow the steps in this article, you'll need an empty 16GB or larger USB thumb drive (USB-C or USB-A, depending on your Mac) and an hour or two of downtime while the installation procedure completes.
Also, be sure to perform a full backup of your Mac beforehand using Time Machine, so that you can restore your original system from the Recovery partition if something goes wrong.
Compatibility Check
macOS Catalina is a major update that introduces a range of new features and changes including cross-platform app support for third-party apps, no more iTunes, iPad as a second screen functionality, Screen Time, and more.
Every Mac that can run macOS Mojave will run macOS Catalina, with the exception of the mid-2010 and mid-2012 Mac Pro models. The full list of compatible Mac models is as follows:
- MacBook (Early 2015 or newer)
- MacBook Air (Mid 2012 or newer)
- MacBook Pro (Mid 2012 or newer)
- Mac mini (Late 2012 or newer)
- iMac (Late 2012 or newer)
- iMac Pro (2017)
- Mac Pro (Late 2013)
To check if your Mac is compatible, open the Apple () menu in the upper left corner of your Mac's screen and select About This Mac. Look just below the OS X version number in the Overview tab – if the Mac model name is the same or a later model year than the one shown in the compatibility list above, your Mac is compatible with macOS Catalina.
How to Perform a Clean Install of macOS Catalina
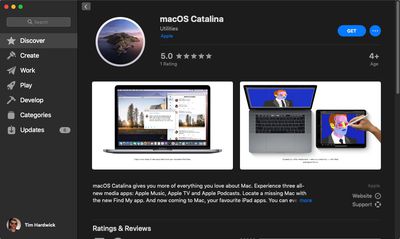
- Download macOS Catalina from the Mac App Store [Direct Link].

- Once the download is complete, close the installer window by selecting the Quit Install macOS option in the menu bar or using the keyboard shortcut Command (⌘) + Q.
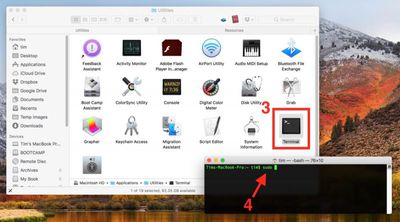
- Launch the Terminal app (found in Applications/Utilities/Terminal).
- At the Terminal command prompt, type sudo followed by a space.
- Next, open a Finder window, navigate to your Applications folder, right-click (or Ctrl-click) on the macOS 10.15 installer, and select Show Package Contents from the contextual dropdown menu.
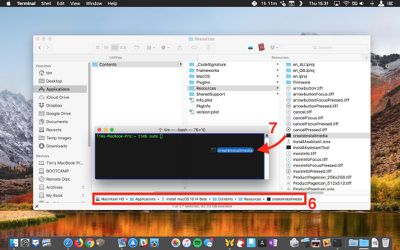
- Navigate to Contents -> Resources within the installer package.
- Drag the createinstallmedia file into the Terminal window.
- Still in the Terminal window, type /Applications/Install\ macOS\ Catalina.app/Contents/Resources/createinstallmedia --volume /Volumes/XXXXX but replace XXXXX with the name of the USB drive you intend to use as a bootable installer.
- Once you've replaced XXXXX in the last step with the name of the USB drive, press the Enter key on your keyboard to run the completed Terminal command.
- Enter your administrator password when prompted.
- Type Y and press Enter when prompted, and the command will create your bootable Catalina installer on the USB drive. This will take a few minutes to complete, so leave it running until you see the message "Install media now available." Note that if you're asked whether you want to install Xcode during the process, you can safely click Not Now and the process will complete successfully regardless.
Restart and Install
You can install Catalina on your Mac as soon as the USB installer has been created. To do so, restart your Mac and hold down the Option (⌥) key as soon as you hear the reboot tone. Then follow these steps:
- Use the mouse pointer or the arrow keys on your keyboard to select the disk called Install macOS Catalina in the drive list that appears on the screen.
- Once the USB drive has booted, select Disk Utility from the Utilities window, choose your Mac's startup drive from the list, and click Erase.
- When your Mac's startup disk is formatted, return to the Utilities window and select Install macOS, choose your freshly erased startup drive when asked where to install the OS, and follow the onscreen prompts to complete the installation.
To install Catalina on another Mac, first make sure it's powered off, then simply plug in the USB installer you created and turn the Mac on. When you hear the boot tone, hold down the Option (⌥) key and follow the three steps above.
(Thanks to Angus for the new Terminal command!)


Top Rated Comments
On those units, the T2 controls the ability to boot from an external drive. To be able to boot off the external drive you have to authenticate as an administrator. That step was left out of the instructions.
In regards to the Internet Recovery method, mentioned in the comments, that will recover you to the OS that was last installed on the Mac, not install a new one.
One more thing, if you erase the main drive and then reboot with a T2 Mac you will have to authenticate as an administrator as I already mentioned to boot off the USB drive, but the Mac looks at the boot drive for administrators that you can log into the security menu to boot from the external drive. Erased boot drive so no known administrators, so no way to boot off the USB drive. (Only a small amount of panic at this point)
What I ended up having to do was the Internet Recovery method, which is how I know it will only allow you to install the last installed OS. Then I installed Catalina over that fresh install of Mojave.
Then booted from the USB drive again, formatted the drive again, rebooted and used internet recovery to install the last installed version of the OS which now was Catalina.
If you are curious about the T2 chip, this white paper helped me to figure out what to do once I was hosed with no administrator:
https://www.apple.com/mac/docs/Apple_T2_Security_Chip_Overview.pdf
If you don't trust the link, search on "Apple_T2_Security_Chip_Overview" and that will pull the article up too.
I am sure there is a more elegant way to accomplish this same thing when a T2 chip is involved. Hopefully someone will write about it after they do it.
In contrast, Microsoft is making it ultra easy to do an offline clean install of Windows 10 by providing a straightforward utility to create a generic Windows 10 bootable USB that can be used to install any version of Windows 10. Wish Apple would do the same.
https://support.apple.com/en-us/HT204904
Yes it will. You can always back-up keychain if you want to.